
Setting Up Your Hardware Wallet: A Secure Initialization Process

Welcome to Blockchain Trends, your compass in the ever-evolving world of decentralized technologies. Beyond the hype of cryptocurrencies lies a vast landscape of innovation, from groundbreaking DeFi applications to transformative enterprise solutions. Are you ready to take control of your digital assets? Dive into our Secure hardware wallet setup guide and discover the crucial steps for initializing your device. Protect your future, starting now.
- Introduction to Secure Hardware Wallet Setup Guide
- Choosing the Right Secure Hardware Wallet for Your Needs
- Preparing for Your Secure Hardware Wallet Setup
- Step-by-Step Secure Hardware Wallet Initialization Process
- Enhancing Security After Initial Setup
- Common Mistakes to Avoid During Hardware Wallet Setup
- Conclusion: Final Thoughts on Secure Hardware Wallet Setup
-
Frequently Asked Questions
- How important is a hardware wallet for securing my digital assets?
- What is the most crucial step during the initial setup of a hardware wallet?
- What should I do if I suspect my hardware wallet has been compromised during setup?
- Can I use a pre-owned or secondhand hardware wallet safely?
- What types of digital assets can a hardware wallet typically secure, beyond just cryptocurrencies?
- Final Reflection: Securing Digital Sovereignty
- Safeguard Your Crypto: Initiate Your Secure Future Now!
Introduction to Secure Hardware Wallet Setup Guide
Importance of Secure Hardware Wallets in Crypto Management
Managing cryptocurrency assets securely is paramount in the digital age, where threats like phishing attacks, malware, and exchange hacks are prevalent. Software wallets, while convenient, often reside on internet-connected devices that are susceptible to these online risks. This is where hardware wallets become indispensable. By storing private keys offline in a dedicated, secure physical device, hardware wallets provide a critical layer of protection, often referred to as "cold storage." This isolation from the internet significantly reduces the attack surface for malicious actors, making it exceedingly difficult for hackers to gain unauthorized access to your funds.
The adoption of a secure hardware wallet setup guide is a fundamental step for anyone holding a significant amount of cryptocurrency. While no security measure is foolproof, hardware wallets represent the current gold standard for individual crypto asset protection. They are designed with robust security features, including secure elements, PIN protection, and multi-signature capabilities in some models, specifically engineered to thwart physical and remote attacks. Understanding the nuances of setting up and using these devices correctly is not just a recommendation; it's a necessity for safeguarding your digital wealth against the evolving landscape of cyber threats.
Overview of the Initialization Process for Hardware Wallets
The initialization process for a hardware wallet is a structured sequence of steps designed to ensure the device is set up correctly and securely from its first use. This process typically begins with verifying the device's authenticity and physical integrity upon unboxing. Following this, the user connects the device to a computer or mobile device and uses the manufacturer's official software to begin the setup. A crucial step involves creating a unique PIN code, which acts as the primary access password for the device.
Subsequently, the wallet generates a recovery seed phrase, usually a sequence of 12, 18, or 24 words. This seed phrase is the master key to your cryptocurrency funds and is paramount for recovering access if the hardware wallet is lost, stolen, or damaged. The secure recording and storage of this seed phrase offline is a critical part of the initialization process, often emphasized as the most important security measure.
The process concludes with verifying the seed phrase and potentially installing necessary firmware updates, setting the stage for secure transaction signing. A thorough secure hardware wallet setup guide will walk you through each of these steps methodically.
Choosing the Right Secure Hardware Wallet for Your Needs
Top Hardware Wallets for Security and Usability
Selecting the appropriate hardware wallet depends on a variety of factors, including the types of cryptocurrencies you wish to store, ease of use, security features, and budget. Several brands dominate the market, each offering a unique combination of features. The most popular and reputable options consistently include Ledger, Trezor, and BitBox, known for their strong security track records and commitment to user safety. Evaluating user reviews and independent security audits can provide valuable insights into the reliability and performance of different models.
When exploring options for a secure hardware wallet setup guide, it's essential to consider the ecosystem provided by the manufacturer. This includes the quality of the accompanying software (like desktop or mobile apps), the range of supported cryptocurrencies, and the availability of customer support. Some wallets offer advanced features like Bluetooth connectivity (e.g., Ledger Nano X) or touchscreens (e.g., Trezor Model T), which can enhance usability, while others prioritize simplicity and minimal attack surface (e.g., BitBox02). Ultimately, the "right" wallet is one that meets your specific security needs and technical comfort level.
Ledger Nano X: Features and Benefits
The Ledger Nano X is a flagship hardware wallet known for its robust security and extensive feature set. It supports a vast number of cryptocurrencies and tokens, making it suitable for users with diverse portfolios. A key benefit is its Bluetooth connectivity, which allows it to be easily used with mobile devices via the Ledger Live app, providing flexibility for managing assets on the go without compromising security. The device utilizes a certified secure element chip (CC EAL5+), designed to withstand sophisticated physical attacks.
Furthermore, the Ledger Nano X boasts a larger screen and internal memory compared to its predecessors, allowing users to install more applications simultaneously. The secure hardware wallet setup guide for the Nano X is integrated into the Ledger Live software, which provides a user-friendly interface for initial setup, managing assets, sending/receiving transactions, and staking certain cryptocurrencies. Its combination of high security, broad coin support, and mobile usability makes it a popular choice among crypto holders.
Trezor Model T: Advantages and Disadvantages
The Trezor Model T is another leading hardware wallet, developed by SatoshiLabs. Its primary advantage is its full-color touchscreen interface, which significantly enhances usability and reduces the risk of physical tampering by allowing users to enter their PIN directly on the device itself, rather than a connected computer. Trezor is also highly regarded for its open-source nature, which allows the wider security community to audit its code for vulnerabilities, fostering transparency and trust.
While the Trezor Model T offers excellent security and ease of use, a potential disadvantage compared to some competitors is its higher price point. Additionally, while it supports a wide range of major cryptocurrencies, the list might be slightly less extensive for very niche tokens compared to Ledger. However, for those prioritizing an intuitive interface and the security assurances that come with open-source hardware and software, the Trezor Model T remains a top contender for a secure hardware wallet setup guide.
BitBox02: Unique Selling Points
The BitBox02, developed by Shift Crypto, distinguishes itself with a focus on simplicity, security, and user control. It comes in two versions: one specifically for Bitcoin only, and a multi-edition supporting Bitcoin, Ethereum, Litecoin, and Cardano. A unique selling point is its capacitive touch sliders for navigation, offering a different user experience compared to buttons or touchscreens. The device also features a microSD card slot for easy and reliable backup of the seed phrase, providing an alternative to writing it down.
The BitBox02 emphasizes security through minimalism and robust engineering. Its firmware is open-source, and the multi-edition uses a dual-chip design (microcontroller and secure element) for added protection. The secure hardware wallet setup guide for the BitBox02 highlights its easy backup process and the BitBoxApp's straightforward interface. While its supported coin list is more limited than Ledger or Trezor, its strong focus on core security principles and unique backup method appeals to users prioritizing these aspects.
Comparing Security Features of Leading Hardware Wallets
When considering a secure hardware wallet setup guide, comparing the underlying security architectures of different devices is crucial. Leading hardware wallets employ various techniques to protect private keys. Most utilize a secure element chip, a tamper-resistant microcontroller designed to securely host sensitive data and cryptographic operations. Ledger devices prominently feature these certified chips. Trezor, while traditionally relying on a general-purpose microcontroller, leverages its open-source firmware and bootloader authentication to ensure security. BitBox02 combines a microcontroller with a secure element in its multi-edition.
Another critical security feature is how the recovery seed phrase is generated and protected. Devices like Ledger and Trezor generate the seed phrase offline on the device itself, ensuring the private key is never exposed to an internet-connected device. The BitBox02 offers the unique microSD card backup option in addition to the standard word list. All reputable hardware wallets require PIN verification for access and transaction signing, protecting against unauthorized physical use.
Encryption Standards and Backup Options
Hardware wallets typically use industry-standard cryptographic algorithms for key generation and transaction signing, such as BIP32, BIP39 (for mnemonic seed phrases), and BIP44 (for multi-account hierarchy). These standards ensure compatibility across different wallet software and enable the derivation of multiple private/public key pairs from a single seed phrase. The seed phrase itself is usually generated using a random number generator built into the hardware, often seeded with additional randomness from the user.
Backup options primarily revolve around the recovery seed phrase. The standard method involves writing down the 12, 18, or 24 words on a provided recovery sheet and storing it securely offline, away from the device itself. Some wallets, like the Trezor Model T, support Shamir's Secret Sharing (SLIP39), which splits the seed into multiple unique shares, requiring a certain number of shares to reconstruct the seed (e.g., 3 out of 5), adding another layer of security against loss or destruction of a single copy.
The BitBox02's microSD backup offers convenience but requires securing the card itself. A comprehensive secure hardware wallet setup guide will detail the specific backup procedures for the chosen device.
Preparing for Your Secure Hardware Wallet Setup
Essential Tools and Requirements for Initialization
Before embarking on your secure hardware wallet setup guide journey, ensuring you have the necessary tools and are in a suitable environment is key. At a minimum, you will need the hardware wallet itself, its original packaging (to verify authenticity), a computer or compatible mobile device with internet access, and the appropriate cable to connect the device (usually USB-A to Micro-USB or USB-C, depending on the model). It's also highly recommended to have a pen and the provided recovery sheet (or a durable alternative like metal plates) ready to record your seed phrase.
Choosing a private and secure location for the setup is equally important. Avoid public Wi-Fi networks or shared computers. Ensure no one can observe your screen or the seed phrase as you write it down. Having a clean, flat surface to work on can also help prevent accidental drops or damage to the device. Taking these preliminary steps creates a controlled environment conducive to a smooth and secure initialization process.
Recommended Software and Firmware Updates
A crucial requirement for setting up most hardware wallets is downloading and installing the official companion software provided by the manufacturer. Examples include Ledger Live for Ledger devices, Trezor Suite for Trezor devices, and BitBoxApp for BitBox02. It is imperative to download this software only from the official website of the hardware wallet manufacturer to avoid malicious copies. Using outdated or unofficial software is a significant security risk.
During the secure hardware wallet setup guide process, the software will often prompt you to update the device's firmware. Firmware is the operating system of the hardware wallet, and updates frequently include critical security patches and bug fixes. Always perform these updates when prompted, following the software's instructions precisely. Ensure your internet connection is stable during firmware updates to prevent interruptions that could potentially brick the device. Regularly checking for and installing firmware updates after setup is also a vital ongoing security practice.
Necessary Accessories for Setup (e.g., USB Cables, Adapters)
Most hardware wallets come packaged with the necessary USB cable for connection. However, verify that the cable is in good condition and fits snugly into both the wallet and your computer/mobile device. Some newer wallets use USB-C, while others still use Micro-USB. If your computer or mobile device uses a different port type, you may need a reliable adapter. Ensure any adapter used is high-quality and functioning correctly.
While not strictly necessary for the initial setup, having a dedicated, known-good cable that came with the device or a trusted replacement is recommended for all future transactions. Avoid using generic or potentially compromised USB cables found in public places. For mobile setup with Bluetooth-enabled wallets like the Ledger Nano X, ensure your mobile device's Bluetooth is working correctly. Having extra recovery sheets or durable storage solutions (like cryptosteel plates) ready for the seed phrase is also advisable before starting the secure hardware wallet setup guide.
Step-by-Step Secure Hardware Wallet Initialization Process
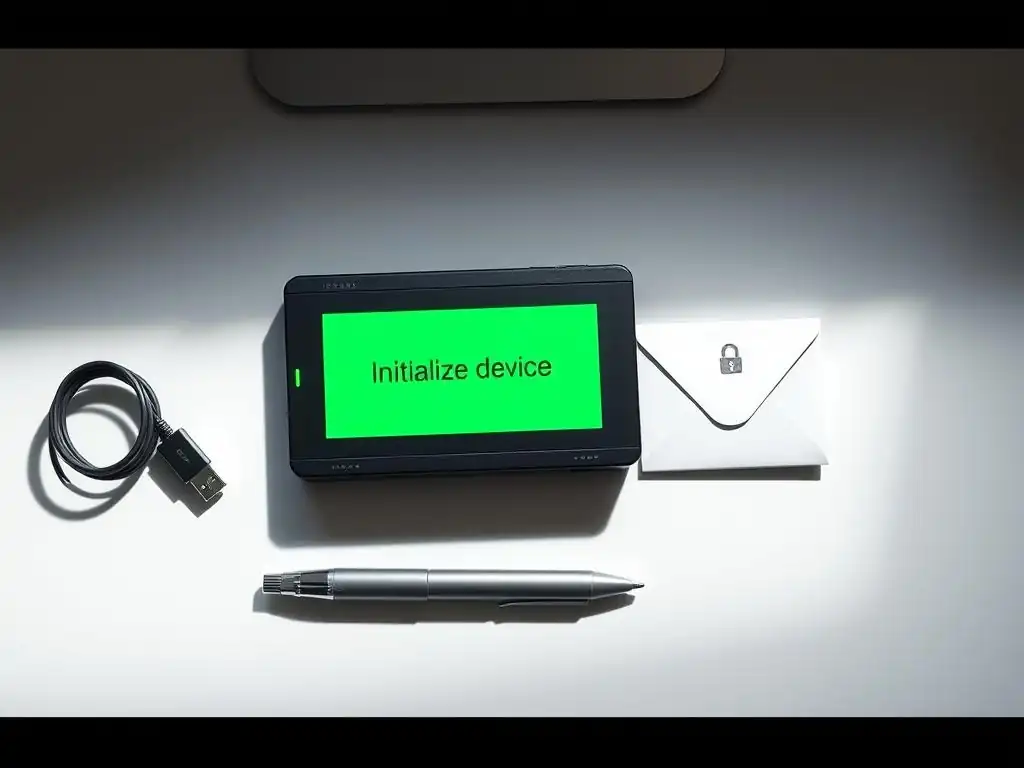
Step 1: Unboxing and Physical Setup
The very first step in your secure hardware wallet setup guide is carefully unboxing the device. Examine the packaging for any signs of tampering, such as broken seals, rips, or signs of being previously opened. Reputable manufacturers use tamper-evident packaging to provide a visual cue if the box has been compromised. For example, Ledger uses holographic stickers, while Trezor packaging often involves seals or shrink wrap that is difficult to replicate. If you notice any suspicious signs, contact the manufacturer immediately and do not proceed with the setup.
Once the packaging is deemed secure, take the hardware wallet and any included accessories out of the box. Familiarize yourself with the device's physical buttons or touch interface. Most wallets have a minimal interface, often just one or two buttons or touch areas, used for navigation and confirming actions. The recovery sheet(s) for writing down your seed phrase should also be present in the box. Keep the box and its contents together in a safe place until the setup is complete.
Checking for Tampering and Authenticity
Verifying that your hardware wallet has not been tampered with before it reached you is a critical security measure. As mentioned, inspect the packaging seals meticulously. Beyond the packaging, some manufacturers provide methods to verify the device's authenticity during the setup process itself, often through the official companion software. For instance, Ledger Live performs an authenticity check when you connect a new Ledger device. This check verifies that the device is a genuine Ledger product and that its firmware has not been modified.
Trezor devices also have checks built into their bootloader. If the firmware has been tampered with or is not genuine, the device will display a warning. Always follow the instructions provided by the official software regarding authenticity checks. If any warning appears or if your physical inspection raised concerns, do not proceed with generating a new wallet or transferring funds. Instead, contact the manufacturer's support with details of your findings. This vigilance is a non-negotiable part of a secure hardware wallet setup guide.
Step 2: Connecting Your Hardware Wallet
After unboxing and verifying the device's integrity, the next step in the secure hardware wallet setup guide is to connect it to your computer or mobile device. Use the USB cable provided in the box or a trusted, high-quality alternative. Connect the smaller end of the cable to the hardware wallet and the larger end to a USB port on your computer. If using a mobile device with Bluetooth, ensure Bluetooth is enabled on both devices and follow the pairing instructions in the app.
Once connected, the hardware wallet's screen (if it has one) should light up, possibly displaying a welcome message or instructions to proceed with setup on your computer. Your computer should also recognize the device. The next action is to open the official companion software that you downloaded in the preparation phase (e.g., Ledger Live, Trezor Suite, BitBoxApp). The software should detect the connected device and guide you through the remaining steps of the initialization process.
Downloading Official Wallet Software (e.g., Ledger Live, Trezor Suite)
As highlighted earlier, downloading the official companion software is a non-negotiable prerequisite. Always download the software directly from the official website of the hardware wallet manufacturer. For example, navigate to ledger.com and find the download link for Ledger Live, or trezor.io for Trezor Suite, or shiftcrypto.ch for BitBoxApp. Never download the software from third-party app stores, email links, or unofficial websites, as these can be vectors for malware designed to steal your private keys.
Once downloaded, install the software following the standard procedures for your operating system. Run the software and select the option to set up a new device. The software interface is designed to be a secure conduit for interacting with your hardware wallet and will guide you step-by-step through creating a new wallet, setting a PIN, generating the recovery seed, and installing necessary applications for different cryptocurrencies. This official software is integral to a secure hardware wallet setup guide.
Step 3: Creating a Secure PIN Code
A fundamental security layer for your hardware wallet is the PIN code. This code is required every time you connect the device or wish to perform a transaction. During the secure hardware wallet setup guide process, you will be prompted to create a new PIN. Most wallets allow a PIN length of 4 to 8 digits, though some may support longer codes. You will enter the PIN directly on the device itself using its buttons or touchscreen, not on your computer, to prevent keylogging.
Choose a PIN that is easy for you to remember but difficult for others to guess. Avoid obvious sequences like 1111, 1234, or your birth date. While hardware wallets have safeguards against brute-force attacks (e.g., they might wipe themselves after several incorrect PIN attempts, like 3 incorrect attempts on Ledger or Trezor), a strong PIN adds significant protection if the device falls into the wrong hands. You will typically be asked to confirm your PIN by entering it a second time.
Importance of Strong PIN Selection
Selecting a strong and unique PIN is a critical defense against unauthorized physical access to your hardware wallet. Although the device's primary security comes from keeping your private keys offline and protected by a secure element, the PIN is the gatekeeper for routine access. If a thief gains possession of your unlocked device, your funds are vulnerable. A robust PIN significantly slows down or completely prevents unauthorized access before the device's auto-wipe feature is triggered.
Consider using a random sequence of digits rather than something personally meaningful. Memorize your PIN and never write it down anywhere near the device or your recovery seed phrase. Treat your PIN with the same secrecy as a bank card PIN, but understand its role is specifically to protect the physical device's usability. A well-chosen PIN is a cornerstone of a secure hardware wallet setup guide.
Step 4: Generating Your Recovery Seed Phrase
This is arguably the most crucial step in the secure hardware wallet setup guide: the generation and recording of your recovery seed phrase (also known as a mnemonic phrase or backup phrase). The hardware wallet will generate a unique sequence of 12, 18, or 24 words based on a cryptographic standard (BIP39).
This sequence is the ultimate backup of your private keys. If your hardware wallet is lost, stolen, or destroyed, you can use this seed phrase to recover access to all your cryptocurrency assets on a new compatible wallet, whether it's another hardware wallet or even certain software wallets.
The device will display the words one by one on its screen. You must carefully write these words down in the correct order on the recovery sheet(s) provided. Double-check each word as you write it. The official software will usually require you to verify the seed phrase by asking you to re-enter a few words from the sequence, ensuring you have recorded it correctly. This verification step is essential – if you write down the seed phrase incorrectly, you will not be able to recover your funds later.
Best Practices for Storing Your Seed Phrase Securely
Storing your recovery seed phrase securely is paramount; it is the master key to your crypto. The most recommended method is to write it down on the provided recovery card(s) using a pen and store it in a safe, offline location. This location should be immune to fire, water, and other physical hazards. Examples include a home safe, a safety deposit box, or a relative's secure location.
- Do not store your seed phrase digitally (e.g., on your computer, phone, cloud storage, or email).
- Do not take a photo of your seed phrase.
- Do not share your seed phrase with anyone, under any circumstances. No legitimate entity (exchange, wallet support, etc.) will ever ask for your seed phrase.
- Consider making multiple copies and storing them in separate secure locations to guard against single points of failure.
- For enhanced durability, consider using metal stamping kits or specialized metal plates designed to withstand fire and water damage instead of paper.
Treat your seed phrase with the utmost secrecy and care. Losing it means losing access to your funds if your hardware wallet is compromised or lost. Having a secure storage plan for your seed phrase is the final, critical step in a robust secure hardware wallet setup guide.
Enhancing Security After Initial Setup
Enabling Two-Factor Authentication (2FA) for Extra Protection
While the hardware wallet itself handles the most critical security function – signing transactions offline – the companion software you use to manage your accounts (like Ledger Live or Trezor Suite) often connects to online services (like checking balances or interacting with exchanges). Enabling two-factor authentication (2FA) on these software platforms and any associated exchange accounts adds an extra layer of security against unauthorized access to your online interfaces.
Typically, 2FA involves linking your account to an authenticator app on your smartphone (like Google Authenticator or Authy). When you log in, in addition to your password, you'll need to enter a time-sensitive code generated by the app. This significantly reduces the risk of your account being compromised even if your password is stolen. While 2FA doesn't directly protect the private keys on your hardware wallet, it protects the online tools you use to interact with your wallet and view your portfolio, which is a vital part of overall crypto security.
Regular Firmware Updates: Why They Matter
Keeping your hardware wallet's firmware updated is not optional; it's a critical security practice. Manufacturers periodically release firmware updates to fix bugs, improve performance, add support for new cryptocurrencies, and, most importantly, patch security vulnerabilities that may have been discovered. Running on outdated firmware leaves your device potentially exposed to known exploits.
The official companion software will usually notify you when a firmware update is available. Always perform updates through the official software and ensure your device remains connected and your internet connection is stable throughout the process. While updates carry a small inherent risk (e.g., power loss during update), the security benefits of patching vulnerabilities far outweigh this risk. Consider setting a reminder to check for updates periodically, perhaps monthly or quarterly, as part of your ongoing secure hardware wallet setup guide maintenance.
Using Strong Passwords and Password Managers
Beyond your hardware wallet PIN and seed phrase, securing your online accounts associated with cryptocurrency is essential. This includes accounts for exchanges, portfolio trackers, and even the login for your computer where you run the wallet software. Using strong, unique passwords for each service is non-negotiable. A strong password is typically long (12+ characters) and includes a mix of uppercase and lowercase letters, numbers, and symbols.
Memorizing dozens of complex passwords is impractical. This is where a reputable password manager becomes invaluable. A password manager securely stores all your login credentials behind a single master password and can generate strong, random passwords for new accounts. Using a password manager reduces the risk of password reuse (where compromising one account compromises others) and phishing attacks (as the password manager won't auto-fill credentials on fake websites). Integrating a password manager into your security routine complements your secure hardware wallet setup guide by protecting your digital perimeter.
Common Mistakes to Avoid During Hardware Wallet Setup
Typical Errors in Initializing Your Hardware Wallet
Several common errors can undermine the security benefits of using a hardware wallet if made during the initialization process. One frequent mistake is downloading the companion software from an unofficial source, which can lead to malware infecting your computer and potentially compromising your seed phrase or transactions. Another error is failing to verify the authenticity of the device itself upon unboxing, leaving the user vulnerable to supply chain attacks where a device might have been tampered with before delivery.
Users sometimes rush through the setup, particularly the seed phrase generation step. Not carefully writing down the words in the correct order, or skipping the seed phrase verification step, is a major risk. If the seed phrase is recorded incorrectly, the user will lose access to their funds if the hardware wallet is lost or damaged. Additionally, performing the setup on a public or unsecured computer, or in a non-private location where others can observe the process, exposes sensitive information like the PIN and seed phrase. Following a detailed secure hardware wallet setup guide precisely helps mitigate these risks.
Misplacing Recovery Seed Phrases
One of the most devastating mistakes is losing or misplacing the recovery seed phrase. As the master key to your funds, its loss means you cannot recover your assets if your hardware wallet becomes inaccessible. Estimates vary, but some reports suggest that millions of dollars worth of cryptocurrency have been permanently lost due to users losing their seed phrases or the devices containing them without a backup.
Even if the seed phrase is written down, storing it insecurely is a common pitfall. Leaving it in an easily discoverable location at home (like a desk drawer), storing it on a computer or phone, or taking a photo of it are all practices that defeat the purpose of offline storage and expose your funds to theft. Proper, secure, offline storage in multiple robust locations is paramount, reinforcing why this step is so heavily emphasized in any secure hardware wallet setup guide.
Ignoring Firmware Updates
Another frequent error, often made after the initial secure hardware wallet setup guide is complete, is neglecting to perform regular firmware updates. Users might perceive updates as inconvenient or unnecessary once the device is working. However, firmware updates often contain crucial security patches addressing newly discovered vulnerabilities. For example, a potential vulnerability in a device's secure element or communication protocol might be discovered, and the fix is released via a firmware update.
Failing to update means your device remains susceptible to these known exploits. While the frequency of critical updates varies by manufacturer and the security landscape, making it a habit to check for updates every few months is a wise practice. Treat firmware updates with the seriousness they deserve; they are a vital part of maintaining the security posture established during your initial secure hardware wallet setup guide.
Conclusion: Final Thoughts on Secure Hardware Wallet Setup
The Importance of Ongoing Security Practices
Completing a secure hardware wallet setup guide successfully is a foundational step, but it is not the end of your security journey. Maintaining the security of your cryptocurrency assets requires ongoing vigilance and adherence to best practices. This includes regularly updating your hardware wallet's firmware, securing the physical location of your device and, most importantly, your recovery seed phrase, and being wary of phishing attempts and malware.
Security is not a one-time configuration but a continuous process. Regularly reviewing your security setup, checking for software updates, and staying informed about potential threats in the crypto space are all part of responsible asset management. The secure hardware wallet setup guide provides the blueprint, but consistent execution of these principles ensures long-term safety.
Encouraging Best Practices for Long-Term Crypto Safety
To ensure the long-term safety of your digital assets, integrate the principles learned during the secure hardware wallet setup guide into your daily routine. Always double-check transaction details on the hardware wallet's screen before confirming. Be extremely cautious about connecting your hardware wallet to unfamiliar computers or using unofficial wallet software. Educate yourself about common scams, such as fake wallet websites or requests for your seed phrase.
By adopting a proactive approach to security, prioritizing the protection of your private keys through your hardware wallet, and diligently safeguarding your recovery seed phrase, you significantly reduce the risk of losing your cryptocurrency. A secure hardware wallet setup guide is your starting point, empowering you with the tools and knowledge needed to take control of your crypto security.
Frequently Asked Questions
How important is a hardware wallet for securing my digital assets?
A hardware wallet is extremely important because it keeps your private keys offline and protected from online threats. This significantly reduces the risk of your cryptocurrency being stolen.
What is the most crucial step during the initial setup of a hardware wallet?
The most crucial step is carefully recording and storing your recovery seed phrase. This phrase is your only way to recover your funds if the device is lost or damaged.
What should I do if I suspect my hardware wallet has been compromised during setup?
If you suspect compromise, do not use the wallet. Immediately contact the manufacturer's support and follow their instructions to secure your assets.
Can I use a pre-owned or secondhand hardware wallet safely?
It's strongly discouraged to use pre-owned hardware wallets. There's a risk the previous owner could have compromised the device, potentially giving them access to your funds.
What types of digital assets can a hardware wallet typically secure, beyond just cryptocurrencies?
While primarily used for cryptocurrencies, some hardware wallets can also secure other digital assets like NFTs and act as hardware authenticators for online accounts.
Final Reflection: Securing Digital Sovereignty
The journey of setting up a hardware wallet, as detailed in this guide, transcends mere technical instruction; it represents a crucial step towards reclaiming control over one's digital assets in an increasingly complex and vulnerable online world. The principles of secure initialization, meticulous verification, and offline key generation are not just best practices, but foundational pillars for building a future where individuals can confidently participate in the digital economy without fear of centralized control or malicious actors.
The impact of this process extends far beyond the individual user. It's about fostering a culture of self-custody and empowering individuals to become their own banks. This shift is vital for decentralization and resilience against systemic risks. As Andreas Antonopoulos eloquently stated, Not your keys, not your coins.
This simple yet profound statement underscores the fundamental importance of understanding and implementing secure hardware wallet practices.
Now, armed with the knowledge from this guide, I urge you to reflect on the power you now possess. Take the time to meticulously follow each step, understand the underlying principles, and share this knowledge with others. By embracing secure hardware wallet practices, you are not only protecting your own assets, but also contributing to a more secure and decentralized future for all.
Safeguard Your Crypto: Initiate Your Secure Future Now!
Thank you for learning how to properly initialize your hardware wallet! With this knowledge, you are better equipped to enhance the security of your digital assets. To strengthen your protection further, consider the following steps:
- Transfer a small test amount of cryptocurrency to your hardware wallet to ensure everything is set up correctly before moving larger sums.
- Explore advanced security guides for tips on multi-signature setups and best practices for passphrases.
- Share this guide with friends who also want to secure their crypto—let's build a community of security-conscious users!
What additional security measures are you implementing to protect your digital assets? Share your tips in the comments below!
Leave a Reply